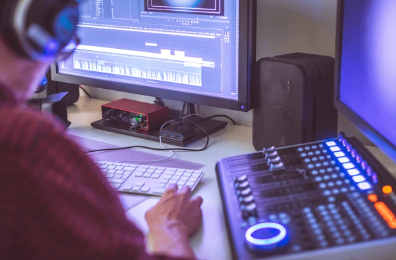
Audio Editing in Premiere Pro

Audio plays a crucial role in video editing, shaping the emotional impact and overall feel of your production. Adobe Premiere Pro offers a robust set of tools for editing audio levels, allowing you to achieve the perfect balance and dynamics for your project. This comprehensive guide will delve into various methods for adjusting volume in Premiere Pro, from basic level changes to advanced techniques for fine-tuning your soundscape.
Understanding Audio Levels in Premiere Pro
Before diving into specific techniques, let's establish some audio editing fundamentals. Audio levels are measured in decibels (dB), with higher dB values indicating louder sounds. Here are some key terms to understand:
- Gain: This signifies the overall amplification or attenuation (reduction) applied to an audio clip.
- Faders: These virtual sliders in the timeline or mixer panel allow you to adjust the volume of audio clips over time.
- Normalization: This process increases the gain of a clip to reach a specific target level, typically used to boost quiet audio.
- Clipping: This occurs when the audio level exceeds 0 dB, resulting in distortion and a harsh sound. It's crucial to avoid clipping to maintain audio quality.
Essential Techniques for Volume Editing in Premiere Pro
There are several ways to adjust audio levels in Premiere Pro, each offering different functionalities:
1. Adjusting Volume in the Timeline
This is the most straightforward method for basic level changes.
- Select the audio clip you want to adjust in the timeline.
- Click and drag the clip's volume handle (the small diagonal line at the top of the clip). Dragging upwards increases volume, while downwards reduces it.
- Alternatively, right-click on the clip and select "Gain..." from the context menu. This allows you to enter a specific dB value for precise adjustments.
2. The Audio Clip Mixer
The Audio Clip Mixer provides a centralized panel for managing audio levels across multiple tracks.
- Go to Window > Audio Clip Mixer.
- Each audio track in your sequence will have a corresponding fader in the mixer.
- Drag the fader up or down to adjust the volume of that specific track throughout the sequence.
3. The Effects Controls Panel
This panel offers more granular control over audio levels within a clip.
- Select the audio clip you want to adjust.
- Look for the "Volume" option in the Effects Controls panel (usually located on the right side of the Premiere Pro interface). Click the triangle next to "Volume" to expand it.
- You can adjust the volume level graph here. This allows you to create fades in and out within the clip or adjust specific sections for emphasis.
4. Normalization
This technique can be helpful for boosting the overall level of quiet audio clips.
- Select the audio clip(s) you want to normalize.
- Right-click and choose "Gain..." from the context menu.
- In the Gain window, check the "Normalize" box. You can then set a target peak level (in dB) to which the clip will be boosted.
Advanced Techniques for Precise Audio Editing
For more intricate audio shaping, Premiere Pro offers additional tools:
- Ducking: This automatically lowers the volume of background music when another audio source (e.g., dialogue) needs to be more prominent. This can be achieved using Premiere Pro's dynamics processing tools.
- EQ (Equalization): This allows you to adjust the frequency balance of your audio, emphasizing or reducing specific frequency ranges for a more tailored soundscape.
- Audio Effects: Premiere Pro offers a vast library of audio effects like compression, limiting, and noise reduction, which can further refine your audio quality.
Best Practices for Effective Audio Editing in Premiere Pro
Here are some key considerations to keep in mind when editing audio levels:
- Maintain headroom: Aim to leave some space below 0 dB to avoid clipping during peaks.
- Monitor your levels: Use the audio meters in Premiere Pro to keep an eye on your audio levels and ensure they stay within a safe range.
- Edit for consistency: Aim for consistent audio levels across your project to maintain a smooth listening experience.
- Utilize fades: Fades can create smoother transitions between audio clips and avoid abrupt changes in volume.
Remember, effective audio editing is an art form. Experiment with different techniques and listen carefully to your audio to achieve the desired balance and impact for your project.
By mastering the tools and techniques outlined in this guide, you'll gain the confidence to manipulate audio levels effectively in Adobe Premiere Pro, crafting a polished and professional soundscape for your videos.


