Chroma Keying with Green Screens in Premiere Pro

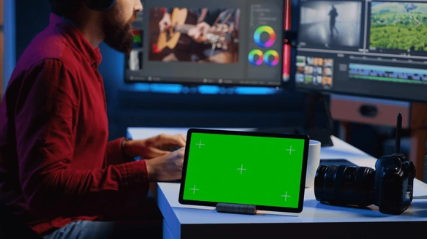
The allure of green screens – transporting your subjects to fantastical locations or seamlessly integrating them into visually stunning composites. Adobe Premiere Pro offers powerful chroma keying tools to unlock the magic of green screens, allowing you to replace the green background with virtually anything you can imagine. This comprehensive guide will equip you with the knowledge and techniques to confidently utilize green screens in your Premiere Pro projects.
Unveiling the Green Screen: Understanding the Process
Green screens, also known as chroma key backgrounds, utilize a specific color (usually green or blue) that can be easily differentiated from the foreground subject. Premiere Pro's chroma keying tools analyze the video signal, isolating the foreground object (your subject) from the green background, allowing you to replace it with a new background of your choice.
Gearing Up for Success: Essential Green Screen Tips
Before diving into Premiere Pro, here are some crucial green screen filming tips:
- Solid Green Background: Ensure your green screen is a uniform, wrinkle-free, solid green color. Avoid shadows or uneven lighting on the green backdrop.
- Color Choice: Green is the most common choice, but blue screens can also be used, especially if your subject has green elements. Consider potential color clashes with your subject's wardrobe.
- Subject Separation: Maintain a clear distance between your subject and the green screen to avoid color spill (green reflecting onto the subject).
- Lighting is Key: Even and consistent lighting is essential. Avoid harsh shadows on either the subject or the green screen.
Chroma Keying in Action: The Premiere Pro Workflow
Once you have your green screen footage, it's time to unleash the magic in Premiere Pro:
- Import Your Footage: Import both your green screen video clip and your desired background image or video clip into your Premiere Pro project.
- Drag to Timeline: Drag your green screen clip onto a video track in your timeline.
- Welcome the Background: Place your background image or clip on a separate video track below the green screen clip. Ensure the background clip aligns temporally with the green screen footage.
- Unlocking the Power: Right-click on your green screen clip in the timeline and select Video Effects > Keying > Ultra Key. This applies the Ultra Key effect, the primary tool for chroma keying in Premiere Pro.
- The Effect Controls Panel: A new panel titled Effect Controls will appear (Window > Effect Controls). This panel houses the settings for the Ultra Key effect.
- The Color Picker: Locate the Key Color setting in the Effect Controls panel. Click on the color picker next to it.
- Sampling the Green: In the preview window, click on a clean area of the green screen background. This tells Premiere Pro which color to key out (remove).
- Refining the Key: The magic happens here! The Ultra Key effect offers various parameters to refine your key. Here's a breakdown of some key settings:
- Tolerance: Adjusts the range of green hues to be removed. A higher tolerance removes more green, but might also affect edges of your subject.
- Feather: Softens the edges of the keyed area, creating a smoother transition between the subject and the new background.
- Spill Suppression: Attempts to remove any green color spill that might be present on your subject.
- Preview and Fine-Tuning: Constantly monitor the preview window in the Effect Controls panel as you adjust the settings. Fine-tune the parameters until your subject is clean-cut and seamlessly integrated with the new background.
Pro Tip: In some cases, you might need to use additional effects like Levels or Color Correction to further refine the look of your keyed subject or the background to achieve a natural and cohesive composition.
Beyond the Basics: Advanced Green Screen Techniques in Premiere Pro
While the Ultra Key effect offers a solid foundation, Premiere Pro provides additional tools for tackling complex green screen scenarios:
- Matte Choker: For stubborn green color spill on your subject's edges, utilize the Matte Choker effect. This effect allows you to define a narrow border around the keyed area and further remove unwanted green pixels.
- Secondary Keyers: For multi-colored green screens or situations where your subject has green elements, consider using secondary keyers like the Chroma Keyer effect. This effect allows you to target and remove specific color ranges beyond the primary green background.
- External Keying Tools: For highly intricate green screen work, explore third-party plugins specifically designed for chroma keying. These plugins often offer advanced algorithms and features for tackling challenging green screen footage.
Embrace the Green Screen Revolution: Conclusion
By mastering the techniques outlined above, you'll be well-equipped to utilize green screens effectively in your Premiere Pro projects. Remember:
- Practice Makes Perfect: As with any video editing skill, mastering green screens takes practice. Experiment with different footage and settings to develop your chroma keying expertise.
- The Art of Masking: While chroma keying removes the green background, sometimes you might need masks to further refine the edges of your subject, especially for flyaway hair or details that blend with the background. Premiere Pro's masking tools allow for precise control over these areas.
- Color Correction is Your Friend: Don't underestimate the power of color correction. Use tools like Lumetri Color to balance the colors between your subject and the new background, creating a natural and unified look.
Green screens open a world of creative possibilities in Premiere Pro. From dazzling special effects to seamless composites, the power is now in your hands. So, grab your camera, set up your green screen, and unleash your inner green screen maestro!


