Essence of Layers in After Effects
After Effects, the industry standard for motion graphics and visual effects, thrives on a fundamental concept: layers. These layers act as the foundation for building stunning visuals, allowing you to stack, manipulate, and animate various elements within your project. But what exactly are layers, and how do they empower your creativity in After Effects? This comprehensive guide delves into the world of layers, equipping you with the knowledge to leverage them effectively in your projects.
I. Unveiling the Essence of Layers
Imagine a layered cake. Each individual layer contributes to the overall flavor and visual appeal. Similarly, in After Effects, layers represent distinct visual elements that combine to form your final composition. These elements can be:
- Images: Import photos, illustrations, or graphic elements as image layers.
- Videos: Breathe life into your project by incorporating video clips as video layers.
- Shapes: Create custom vector shapes using the pen tool or pre-built shapes like rectangles, circles, or stars. These become shape layers.
- Text: Add titles, captions, or dynamic text elements using text layers.
- Solids: Generate solid color blocks for backgrounds or visual effects with solid layers.
- Camera: Define a virtual camera's position and movement within your 3D space using camera layers.
- Light: Illuminate your scene and create realistic lighting effects with light layers.
- Adjustment Layers: Apply color correction, effects, and adjustments globally or selectively to specific layers using adjustment layers.
II. Navigating the Layer Hierarchy: The Timeline Panel
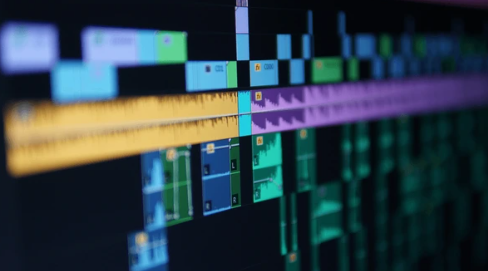
The Timeline panel in After Effects serves as the central hub for organizing and manipulating your layers. Each layer appears as a horizontal track, with the bottom track representing the background and subsequent tracks stacked on top. This layering order determines the stacking order of your visuals – elements on higher tracks appear in front of those below.
III. Essential Layer Properties: Controlling Your Visual Elements
Each layer possesses a unique set of properties that define its appearance and behavior within your composition. These properties, accessible through the Properties panel, allow you to fine-tune your layers:
- Transform: Change a layer's position, size, rotation, anchor point, and opacity.
- Content: Edit the specific content of the layer, such as the image source, video clip properties, or text content.
- Effects: Apply various visual effects to specific layers to enhance their appearance or create dynamic animations.
- Blending Modes: Control how layers interact with each other visually by utilizing blending modes like Multiply, Overlay, or Screen.
- Masks: Define areas of transparency within a layer using masks, allowing you to reveal or hide specific portions.
IV. Animation Fundamentals: Breathing Life into Your Layers
One of the most powerful aspects of layers is the ability to animate them. By adjusting a layer's properties over time, you can create captivating motion graphics and visual effects. After Effects offers various animation tools to bring your layers to life:
- Keyframes: Set specific values for a layer's properties at different points in time. The software interpolates the values between keyframes, creating smooth animation.
- Motion Paths: Animate a layer's movement by defining a path it should follow over time.
- Expressions: Utilize expressions, a powerful scripting language within After Effects, to create complex animations based on calculations or interactions between layers.
V. Advanced Layer Techniques: Expanding Your Creative Horizons
As you delve deeper into After Effects, explore advanced layer techniques to unlock even more creative possibilities:
- Pre-Compositions: Nest multiple layers into a pre-composition to create more manageable sub-compositions that can be animated or manipulated as a whole.
- Layer Parenting: Make layers dependent on others. When you animate the parent layer, the child layers move along with it, creating complex animations.
- Track Mattes: Use one layer to define the mask for another layer, allowing for creative compositing techniques.
VI. Collaboration and Best Practices: Working Efficiently with Layers
- Layer Naming: Implement a clear and consistent naming convention for your layers, making it easier to navigate complex projects.
- Organization: Group related layers together to keep your timeline panel organized and efficient.
- Color Coding: Assign colors to your layers to visually differentiate between elements, especially in large projects.
- Collaboration: When working with others, establish clear communication regarding layer naming and organization for a smoother workflow.
VII. Conclusion: Layers - The Foundation of Stunning Visuals
By understanding the power of layers, their properties, and animation capabilities, you've unlocked the key to building awe-inspiring motion graphics and visual effects in After Effects. Remember, mastering layer organization, animation techniques, and best practices will empower you to create efficient and visually captivating projects.


