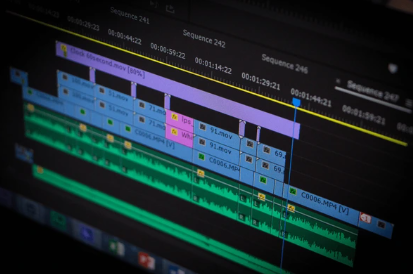
Seamless Storytelling - Mastering Transitions in Premiere Pro

Video editing is an art form that relies on creating a cohesive flow between different scenes. Transitions play a crucial role in achieving this by bridging cuts between clips, enhancing the narrative structure, and guiding the viewer's attention. This comprehensive guide explores the various transition techniques in Premiere Pro, equipping you with the knowledge to craft a seamless visual journey for your audience.
The Power of Transitions: From Subtlety to Spectacle
Transitions go beyond simply connecting clips. They can:
- Smooth Cuts: A well-placed dissolve can create a natural flow, akin to turning a page in a story.
- Emphasize Action: A dynamic wipe transition can inject energy and excitement into fast-paced sequences.
- Create Mood: A subtle fade to black can establish a more contemplative atmosphere.
- Guide the Eye: Transitions can direct the viewer's attention to specific elements within the frame.
Finding the Right Transition: A Premiere Pro Toolkit
Premiere Pro boasts a vast library of transitions categorized for easy access:
- Dissolves: The classic and versatile option, dissolving creates a gradual fade between clips.
- Wipes: These transitions "wipe" away one clip to reveal the next, offering a directional flow.
- Slides: Similar to wipes, slides push one clip off-screen to reveal the next, creating a sense of movement.
- Cross-Modes: These transitions combine dissolve effects with other visual manipulations, adding a creative flair.
- Audio Transitions: Don't neglect sound! Use audio transitions to smoothly blend between audio clips, avoiding abrupt jumps.
Applying Transitions with Ease:
There are multiple ways to add transitions in Premiere Pro:
- Drag and Drop: Locate the desired transition in the Effects Panel (Window > Effects). Expand the Video Transitions folder and drag the transition onto the cut between two clips on the timeline.
- Right-Click Menu: Right-click on the cut between clips and select Apply Default Transition. This adds a basic dissolve to both video and audio tracks.
- Keyboard Shortcut: Press Ctrl+T (Windows) or Command+T (Mac) on the selected clip to add the default transition to its following clip.
Fine-tuning Your Transitions:
Once applied, you can customize your transitions for optimal impact:
- Duration: Adjust the transition's length by dragging its edges on the timeline.
- Effect Controls Panel: Access detailed settings for each transition. Here, you can tweak properties like direction, speed, and opacity (for dissolves).
- Transition Presets: Premiere Pro offers pre-built transition presets that combine different effects for a stylized look. Explore these presets and experiment to find ones that suit your project's aesthetic.
Advanced Transition Techniques:
For even greater control and creative expression:
- Nested Transitions: Combine multiple transitions for a complex and visually striking effect.
- Custom Motion Graphics: Create unique transitions using Premiere Pro's Motion Graphics tools.
- Third-Party Plugins: Explore the vast world of third-party plugins that offer additional transition effects and styles.
Choosing the Right Transition: Matching Style and Story
The effectiveness of a transition hinges on how it complements your project's style and narrative. Here are some considerations:
- Fast-paced edits: Opt for dynamic wipes or energetic cross-dissolves.
- Slower, contemplative sequences: Utilize subtle dissolves or fades to black for a seamless flow.
- Documentary or interview-style edits: Maintain a clean and unobtrusive style with basic dissolves or cuts.
- Experimental or artistic projects: Break the mold and explore unconventional transitions to create a unique visual language.
Beyond the Basics: Using Transitions for Emphasis
Transitions aren't just for connecting clips. Use them strategically to draw attention:
- Highlight Key Moments: Employ a impactful transition to emphasize a pivotal scene or reveal a new location.
- Shift in Time or Mood: Utilize transitions to signal a jump forward or backward in time, or a change in the emotional tone of the scene.
Conclusion: Transitions as Storytelling Tools
Mastering transitions in Premiere Pro empowers you to not only connect your clips but also enhance your storytelling. By understanding the different transition types and applying them thoughtfully, you can craft a captivating visual experience that guides your viewers through your narrative. Remember, experimentation is key! Explore different techniques, discover what resonates with your project, and use transitions as powerful tools to elevate your video editing to the next level.


