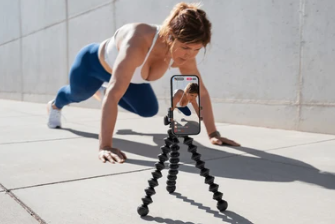
Reframing Your Vision - Mastering Reels with Premiere Pro

Instagram Reels have become a powerful tool for creators and businesses alike. But what if your existing video content isn't filmed in the portrait format Reels requires (9:16)? Fear not! Adobe Premiere Pro offers several methods to seamlessly reframe your landscape or square footage for captivating Reels. This guide dives deep into each approach, equipping you to optimize your content for the ever-evolving social media landscape.
Method 1: Auto Reframe Sequence - Effortless Transformation
The latest versions of Premiere Pro boast a time-saving feature: Auto Reframe Sequence. This one-click wonder analyzes your footage and automatically adjusts the framing for your desired aspect ratio. Here's how to utilize it:
- Right-click on your existing sequence in the Project panel.
- Select Auto Reframe Sequence.
- Choose the target aspect ratio - for Reels, select Vertical (9:16).
- Optionally, adjust the Motion Tracking mode based on your footage's movement (e.g., Slower for static shots).
- Click Create. Premiere Pro analyzes your clip and generates a new sequence reframed for Reels.
Fine-tuning the Auto Reframe:
While Auto Reframe is impressive, it might not always perfectly capture your vision. Here's how to refine the results:
- Effect Controls Panel: Select the reframed clip and navigate to the Effect Controls panel. Under the Reframe section, you can adjust Position and Scale to better center your subject.
- Keyframing: For complex movement, use keyframes to manually control the framing throughout the clip. Click the stopwatch icon next to Position and adjust the values over time.
Method 2: Essential Graphics - Custom Control
For even more control over the reframing process, leverage Essential Graphics:
- Open the Essential Graphics panel (Window > Essential Graphics).
- Click the New Layer icon and select Rectangle.
- Drag the rectangle onto your timeline above the video clip.
- Resize the rectangle to cover the entire video frame, leaving black bars on the top and bottom to achieve the 9:16 aspect ratio.
- Adjust the Opacity of the black bars to control their visibility.
Method 3: Manual Cropping - Precise Framing
For a hands-on approach, consider manual cropping:
- Select the clip on the timeline.
- In the Program Monitor, use the Zoom Tool to identify the ideal framing within your clip.
- Click the Crop Tool (looks like a cropping tool) in the Program Monitor.
- Drag the handles to define your desired crop area (ensuring it maintains a 9:16 aspect ratio).
- Click the Apply button to finalize the crop.
Choosing the Right Method:
The best method depends on your video content and desired level of control. Here's a quick guide:
- Auto Reframe Sequence: Ideal for quick edits, especially for static shots.
- Essential Graphics: Offers flexibility for adding overlays or graphics while reframing.
- Manual Cropping: Provides the most precise control but requires more time and effort.
Additional Considerations for Reels:
- Text & Overlays: Ensure text and overlays are large enough to be readable in the vertical format. You might need to resize or reposition them.
- Captions & Subtitles: Consider adding captions or subtitles to enhance accessibility and cater to viewers with sound off.
- Reel Length: Reels can be up to 60 seconds long. Plan your reframed content accordingly.
By mastering these reframing techniques in Adobe Premiere Pro, you can breathe new life into your existing video content and create captivating Reels that resonate with your audience. Remember, experimentation is key! Explore different methods, find what works best for your workflow, and unleash your creativity on the Reels stage.


